Thursday, May 27, 2010

Smoked Salmon Faux Frittata

I don't know what else to call it. A frittata is started on the stove, then transferred to the oven. I must confess that I do not have an oven-safe skillet. Thus, the "faux."

Preheat the oven to 300° and oil a baking dish. In a frying pan, cook thinly sliced onions until they are translucent. Add flaked smoked salmon and sliced black olives. Pepper to taste. Warm through and set aside.

Whisk six eggs together with a splash of milk and a couple spoons of sour cream.

Add the salmon, olives and onions to the baking dish. Spread some diced tomatoes and chopped fresh basil over the top. Cut a package of cream cheese into cubes and evenly space them in the pan. Now gently pour the egg mixture over the top.

I baked this for 30 minutes and then turned the broiler on for an additional 5 minutes. Garnish with some slices of avocado and enjoy. This came out better than I could have hoped. Simply delicious!

Bon appétit!

Wednesday, May 26, 2010

South of France Lemon Cheesecake

When The Boss Carlo left the library, she selected this cheesecake for her farewell party. Now the music cataloger is leaving, and she selected this one as well. And it will be payday. So, two birds, one stone.

This is the easiest cheesecake to make. I assert the superlative confidently. You shall see Dear Reader. You shall see. And then you will believe.

First of all, there is no crust. Simply line a 9-inch cheesecake pan with parchment paper as I have preached all along.

In a large bowl, stir a couple pounds of ricotta cheese with a rubber spatula until smooth. Add sugar and flour and mix until incorporated. Then six eggs are added, one at a time, mixing after each addition. Finally (yes, finally) lemon zest, lemon juice, vanilla and a little cinnamon are added.

Pour the batter into the pan and pop it into a 300° oven for 75-90 minutes. This cheesecake will be done when a knife can be inserted in the center and come out clean. (Other cheesecakes are done when lightly browned and or jiggly in the center).

This is a refreshing diversion (if one were to be needed) from the usual cheesecake. The texture differs from the "normal" cheesecake. As you can see from the picture, a large crack developed on the top of the cake as it cooled. Fortunately, it won't affect the taste.

Bon appétit!

Saturday, May 22, 2010

Smoked Salmon Ravioli

Homemade pasta filled with homemade smoked salmon? Sure. Why not? I have an old ravioli maker from my grandmother. Still in the original box no less. And I have a hand-crank pasta maker as well. I was set.

I mixed the pasta dough with my hands. There really is no other way. I didn't have semolina flour so I used regular all-purpose flour. Two cups flour, two eggs, two tablespoons each of olive oil and water. The dough is a little rough to knead together. After it is well-mixed, let it rest for 15 minutes.

I set up the pasta maker on the counter and divided the dough into quarters. Working with a quarter at a time, I cranked it through the pasta maker, progressing from setting one through four, running the developing sheet through each setting a couple of times.

I lightly floured the ravioli maker and lay the pasta sheet across the top. Taking about a tablespoon of shredded smoked salmon, I pressed it into each indentation of the ravioli maker.

Then make another pasta sheet to go on top. Prior to laying it on though, brush a little water on the pasta in the tray. This will help in sealing the ravioli. Lay the sheet on top and gently work out any air bubbles that may be present. Then, using the small rolling pin from the ravioli maker, seal and crimp the ravioli. Gently remove the ravioli from the mold and onto a cookie sheet. I have found that popping these into the freezer makes separating the ravioli a whole lot easier.

I made a second set of twelve raviolis, and froze them all. I returned to the freezer later to gently shake the raviolis to help keep them from freezing together.

The raviolis are cooked in gently boiling water. They only need a couple minutes to cook the pasta and heat the salmon filling. I served these with sun-dried tomato tapenade, slices of steamed zucchini, sliced avocado and shaved Parmesan cheese. Garlic bread on the side. Of course.

Bon appétit!

Monday, May 17, 2010

Black Forest Cheesecake

Cheesecakes do not get much easier than this one. For the Benton County Mental Health mid-month staff meeting, I prepared a Black Forest cheesecake.

I used chocolate double-stuffed Oreos for the crust. The cookie filling serves as the binding agent so the butter can be eliminated. This is not a health choice, but a choice that makes things simpler.

Cream cheese and sugar are beat on high for three minutes. Then two eggs are added, one at a time, and incorporated. The sides are scraped down and six ounces of semi-sweet chocolate, melted and cooled, and vanilla are added.

The mixture is poured onto the crust and the cake is baked at 350° for 45 minutes.

After allowing to cool for a couple hours, the cake is refrigerated overnight. For a topping, I used a can of cherry pie filling.

Bon appétit!

Sunday, May 16, 2010

Asparagus Pesto

I found another recipe in the New York Times that looked both interesting, and more importantly, easy. Asparagus pesto! I didn't follow the recipe exactly, but it proved a good starting point.

I broke off the tough ends from about three pounds of asparagus. I cut the spears in half and boiled them for about ten minutes. Just until tender, but not mushy.

After draining the asparagus I put them in the food processor and added a couple handfuls of filberts, some garlic, grated Parmesan cheese and a little salt. I turned on the processor and slowly drizzled some olive oil in until the mixture was the consistency I was after. To be honest, I didn't know the consistency I was after. It was about a quarter cup of oil though.

To serve, I offered the pesto in a bowl with slices of baguette. It was scrumptious.

Bon appétit!

Sun-Dried Tomato Tapenade

Since I already had the food processor out, I thought I'd try something else. Something new. Something from my imagination. I still had a bunch of sun-dried tomatoes from last year's harvest and decided I'd invent a tapenade.

First, I brought a pot of water to a boil and added a bunch (there was no measuring involved) of dried tomatoes. I boiled them for 5-10 minutes. Enough to soften them, but not so much as to turn them mushy.

I drained them and added them to the food processor. Then I added a few handfuls of filberts, fresh basil, garlic, Parmesan cheese and some balsamic vinegar. As the ingredients were processed, I slowly drizzled in some olive oil. I wanted a coarse yet spreadable mixture. I got it.

I served my creation with slices of baguette, and it was absolutely delicious. I couldn't have been happier with it!

Bon appétit!

Grilled Salmon

For our Sunday entree, I planned to grill the remaining fillet from the salmon that Brian had delivered a few days earlier. I was going to a baseball game prior to dinner so this had to be kept simple. In hindsight, I could not have made it simpler.

I chopped up some thyme, Italian parsley and dill. In a bowl I mixed some olive oil and naranja agria, then added the herbs. I used a spoon to kind of mush the herbs a bit in order to get the juices flowing. I popped this into the fridge until I returned from the game

Naranja agria is bitter orange juice and is available at Latin grocery stores. It is fantastic for marinades!

When I returned home, I fired up the grill and laid the salmon on the rack. Then I spooned the marinade onto the fish. C'est tout! After 10-15 minutes it was time to eat.

Sometimes I think I need to perform a lot of fancy culinary tricks to achieve deliciousness. This was a time when I was reminded that sometimes the simplest things are the tastiest.

Bon appétit!

Friday, May 14, 2010

Smoked Salmon

Ah. Smoked salmon. Who does not love smoked salmon? Even the devoutest of vegetarians might make an exception for good smoked salmon.

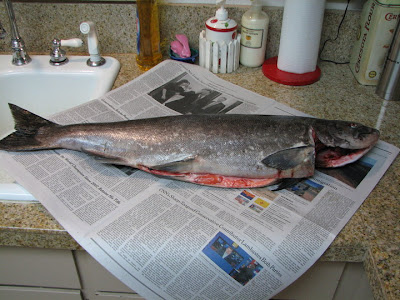
It has been a while since I last did this, but here goes. First, get a salmon. I have a great way for doing this. One of my Special Olympics athletes, Brian, is quite the fisherman. Two days ago he showed up at my door with a salmon in a plastic bag. A fifteen-pound salmon, give or take. (I did buy him an OREGON t-shirt that I'll give him at the baseball game tonight).

There would be a few firsts in this process. It was the first time I filleted a salmon with a real fillet knife. And it was the first time I filleted a salmon in our house, with its ample counter space. A few years ago, I struggled with a regular kitchen knife on the tiny bit of counter in my old apartment. Filleting a salmon is an art, one which I make no claims to having mastered. But I did find that given the proper knife, and enough space, the process went smoothly. Too smoothly?

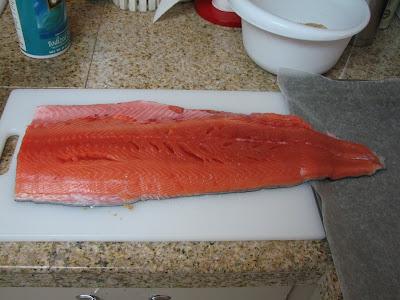
I then cut the fillet into pieces, or slabs, about 1-2 inches thick. As I do this, a simple twist of the knife removes the skin from the fish. I like to leave the tail portion about six inches. No reason. I just like to.

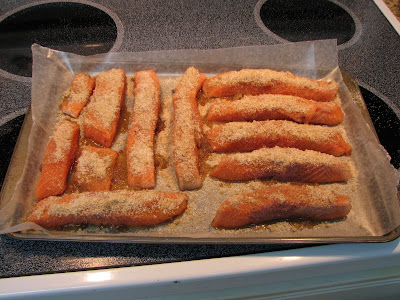
The pieces of salmon are dredged thoroughly in a mixture of equal parts iodized sea salt and brown sugar. Really pack it around the fish. The pieces are placed on a waxed paper lined cookie sheet and refrigerated for a day or two. The salt and sugar draw out excess moisture from the meat in preparation for smoking.

Now, rinse the salt and sugar from the pieces of salmon. You cannot scrub too hard here. The sugar will have infused the fish. You just don't want it to be too salty. Place the salmon onto clean waxed paper and blot excess water with a paper towel. At this point I like to brush the fish with some maple syrup, and pop it back into the fridge overnight.

Now we are ready to smoke the salmon. Get the smoker ready to go and retrieve the salmon from the refrigerator. Place the pieces of fish on the smoking screens, allowing space between them. I give them another brushing of maple syrup before I pop them in the smoker.

I just use the store-bought smoker chips. Fill the chip pan, place the racks in the smoker, and...plug it in. After an hour I put new chips in the smoker pan. After two hours, the smoked salmon is done. Sometimes a little more, or a little less time. It depends on the consistency you're looking for. I like a caramelized outside with a tender inside.

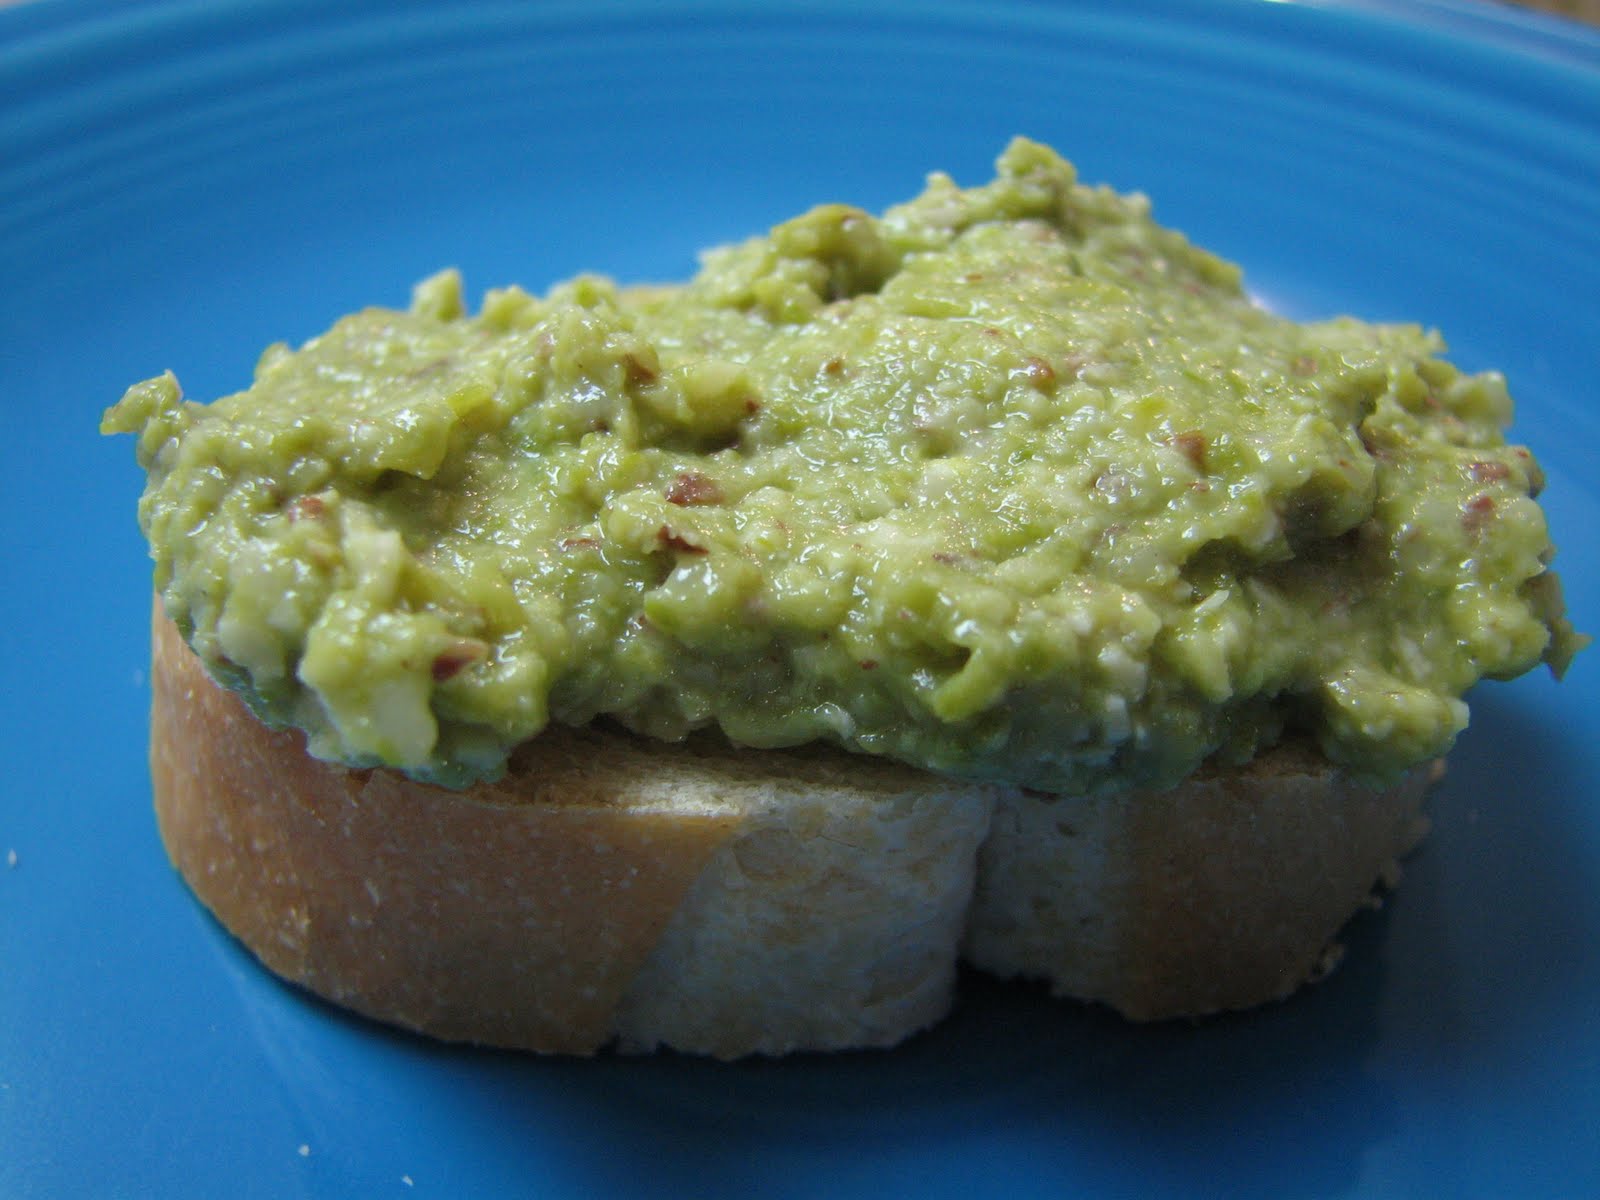
Now the only thing left to do, is to eat it.

Bon appétit!

Monday, May 3, 2010

Savory Crêpes with Chicken, Asparagus & Sun-Dried Tomatoes

This is more of an assembly of recipes covered in earlier posts than a new recipe. My plan was to come up with something that wouldn't take too much time to prepare on a week night. For this dinner I'll use crêpes, but will omit the sugar from the recipe; roasted asparagus with reconstituted sun-dried tomatoes; fried chicken breast, cut into cubes; and store-bought chicken gravy from a jar.

First, Susie cooked the chicken. Then I made the crêpes. I spread a little kalamata olive paste on each prepared crêpe. Into each I laid a few asparagus spears, a bit of diced chicken, and some of the tomatoes. I nuked the gravy and drizzled a little over the assembled crêpes. Finally, I garnished with some chive flowers. Because I can. And that is it. Really.


Bon appétit!

Sunday, May 2, 2010

Crêpes with Strawberries & Whipped Cream

I am going to watch a couple hours of baseball on television this morning, and then go to a baseball game this afternoon. Something needed to be done to keep things running smoothly at home. The answer: Sunday morning strawberry crêpes. With whipped cream!

The batter is as simple as it gets: 2 eggs, 1 cup milk, 1/2 cup flour and 2 tablespoons sugar. Whisk the eggs and then add each ingredient in succession, fully incorporating each one as you go. A blender would work fine as well. I went with the whisk just to keep clean up to a minimum. Refrigerate the batter for an hour. Or not. Chilled batter is easier to work with during the cooking portion of the recipe.

I melted a little butter and had it at hand as I prepared to cook the crêpes. I brushed a little butter in a nine-inch frying pan. Then I used a 1/4 cup measuring cup as a ladle and poured a nearly-full scoop of the batter into the center of the pan. I rolled the pan to spread the batter evenly across the bottom. After a minute or so, I used a spatula to loosen the edge of the crêpe and, using my fingers, gently lifted it from the pan, turned it, and returned it to the pan and the heat to cook the other side. Another minute or so. Remove the crêpe from the heat to a plate and repeat until the batter has been exhausted. This recipe made 9 crêpes. Four for each of us, and one to wolf down when Susie wasn't looking.

For the filling, we had some strawberries from last season. In the freezer. Susie took them out to thaw last night. This morning she added a little sugar to them.

I placed some of the sweetened strawberries in the center of a crêpe and folded it into quarters. Four of these filled a medium plate nicely.

I am all about convenience. Some times. For the whipped topping, I used canned whipped cream. It would just be easier than whipping and sweetening cream. Clean up would be easier as well. For Susie. (Unwritten agreement: one cooks, the other cleans. Most of the time.)

Bon appétit!